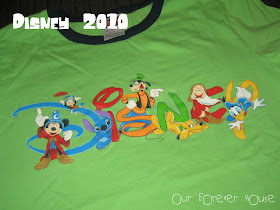
Since our kids are 4 and 6 (prime Disney age) we decided to buy annual passes this year. We had determined that with just 2.5 trips, we would have them paid for and while we have many fun family vacation ideas, our kids are still a little young to appreciate and enjoy the national parks, museums, etc. that we want to visit. So 2011 is the "Year of Disney" for our little family!!!
 |
| The Boy & I riding Dumbo - our favorite! While Dad & Sis were off riding the roller coaster!!! |
We have a tradition of wearing matching Disney shirts when we go to Disney. We have been fortunate to be able to visit Disney a few times over the last 3 years. Our first trip was a one day visit to celebrate my husbands 40th birthday! That year Disney was offering free admission on your birthday plus both kids were under 3 so they were free. We only had to pay my admission! Not bad! We surprised my husband by all wearing matching shirts that I made on Zazzle! We went with his cousins so there were 10 of us running around with our matching shirts!
 |
| My Husband's Birthday Shirt! |
When we went to Disney a couple of months ago, my husband's cousin Colleen asked us where our matching shirts were! Of course, I couldn't let that sarcastic jab go ... I needed to show her that I am a creative genius! Hee hee!
I recently have seen a number of blog posts about using a bleach pen to create a design on colored shirts (here)! That paired with a fun photo of a tie dyed shirt I had found here. I had my plan!
I picked up some cheap red shirts at JoAnns last week and grabbed a bleach pen from the grocery store and got to work. Using the tutorial provided by Kim at Vitamin C (more on her awesome version at the end of this post), I set out to work.
1. Prep Shirts: I prepped my shirts by inserting boards and cardboard between the layers so the design would not bleed to the back of the shirt.
2. Plan Design: I wanted to do a mickey head like the tie dye inspiration. I then used a plate and cup for the kids shirts and a platter and bowl for the adult shirts as my guide.
3. Draw on Design with Bleach Pen. I made my Mickey Mouse head by tracing around the guides using the bleach pen. I gently lifted my forms off and let them dry. I wanted my design to be white, so I let the design sit over night (well mostly because it was getting late and I was tired)! If you want some of the shirt color to remain, simply rinse off the bleach after about 10 minutes.
4. Rinse/Wash off Bleach: Once you have reached your desired color, rinse the bleach off thoroughly and let the shirt dry.
5. Back of shirt: I wanted the design to continue on the back of the shirt. To do this you simply repeat steps 1-4. I had let the bleach dry so I skipped step 4 to complete my design. I readjusted the shirt and boards, reset my guides and completed the design using the bleach pen.
6. Wash and Wear: Once the bleach was dry, I through them in the washer and voila!
Can't wait to wear these on Monday!
Back to Vitamin C - she did some amazing doodle artwork on a t-shirt that I just loved. I think I will doodle up my Disney shirt after this trip so that I can just wear it any time. And then later in the week, she made some AMAZING wall art! I CAN'T WAIT TO TRY THIS!!! Here are a couple of her pictures - awesome possum!!!

What are YOU bleaching?
Linked Up With...


Those turned out great!! Can't wait to see them on you guys!
ReplyDeleteLove this. Very fun mickey shirts!
ReplyDeleteI love Disney! My husband and I got engaged there! My Savvy HomeMade Monday blog party is still open and I would love for you to link your shirts up at http://www.homesavvyatoz.com/2011/07/28/savvy-homemade-monday-party-1/
ReplyDeleteI am a new follower!
Thanks for linking up!
ReplyDeleteI just found your blog through "made by you monday" We are going to Disneyland in Sept and I found this blog that had cute disney shirts to. So many cute ones. http://vermillionrules.blogspot.com/2011/02/diy-disneyland-shirts-no-sew-version.html. just thought I would share
ReplyDeletebambo79@hotmail.com